Download & Install
-
Go to the Microsoft Store and search for ‘Xelion’ or click here.
-
Download the app.
-
Give the app permissions when it asks.
-
Log in in the manner that is recommended by your service provider.
The website and the app use the language that is set on your device.
Overview
You can largely control the layout of the Xelion Windows App desktop. You do this in your user settings.
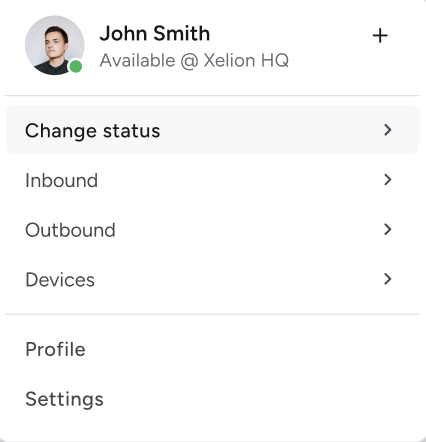
Press on your avatar in the top right to go to your user settings.
Press ‘personalisation’.
You personalisation settings open.
In the expandable sidebar on the left you can choose:
-
from which lines you want to receive calls and messages;
-
with which line you want to make outgoing calls
-
which devices you want to receive calls on.
At the top of your communication overview, you see your line picker. If you have signed on to more than one line, this lets you choose which line is visible in your communication overview.
You can open the number keys by clicking on the keys icon at the bottom of the communications overview.
You can now choose how many spots for widgets you want to see.
On the desktop itself you can decide which widget should be put where, and if it should be pinned in place or be reset when you restart the app.
Next to your avatar in the top right, you see your notification icon. Here you see if you have missed calls or unread messages.
Set your status
-
Press your avatar.
Your user profile opens. -
Press your current status.
The status menu opens. -
Select your status in the drop-down menu.
This status stays until the next planned status change, for instance from the line schedule.
or set a ‘temporary status’ if you want your status to stay fixed until you choose to end it.
Administrators can make one of more custom statuses in Xelion.
If you see a status that is unclear to you, ask your administrator about it.
Choose your lines
-
Expand the sidebar on the left.
Your line settings open.
There is a switch in front of every incoming line that you are allowed to join or leave. -
Put the switch in the correct position to sign on to the line.
-
Select your outgoing line from the drop down menu.
This is the information with which you make outgoing calls.
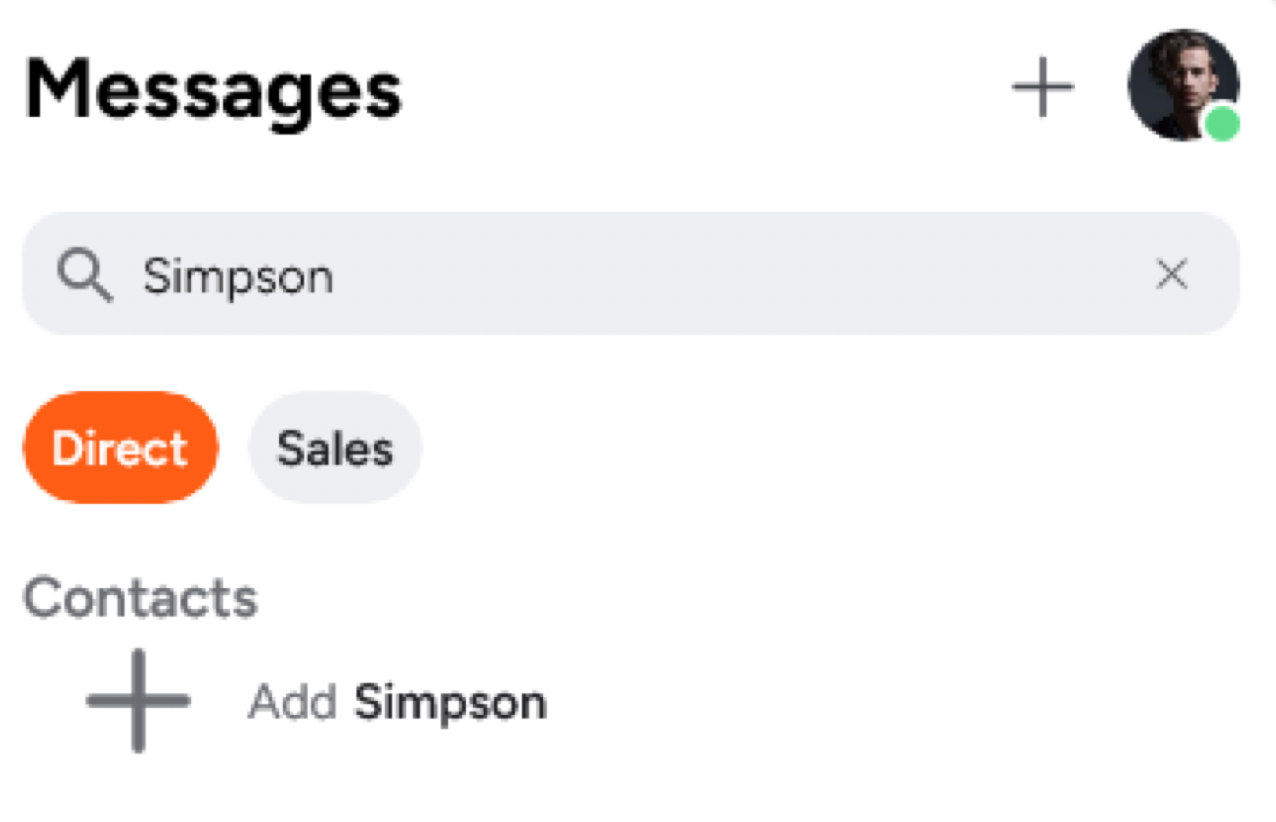
Add a contact
-
Enter the name of the new contact in the search bar at the top of the communication overview.
-
Press ‘Add [contact name]’.
-
Select the correct category for the contact.
-
Enter the data for the new contact.
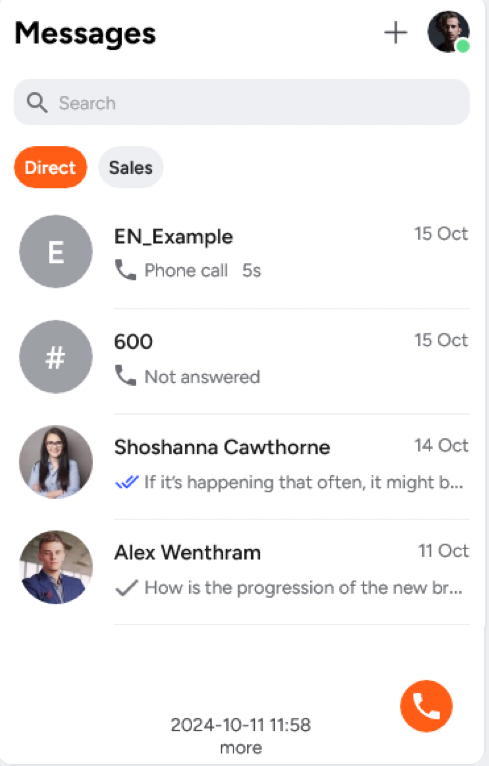
Make a call
-
Click on the orange button with the receiver in the bottom left of the communication overview.
A pop-up opens with the number keys and a list of your recent contacts. -
Select a recent conversation, or dial a phone number with the keys.
-
Press the receiver.
If the contact has multiple phone numbers, select the correct one.
Xelion starts the call.
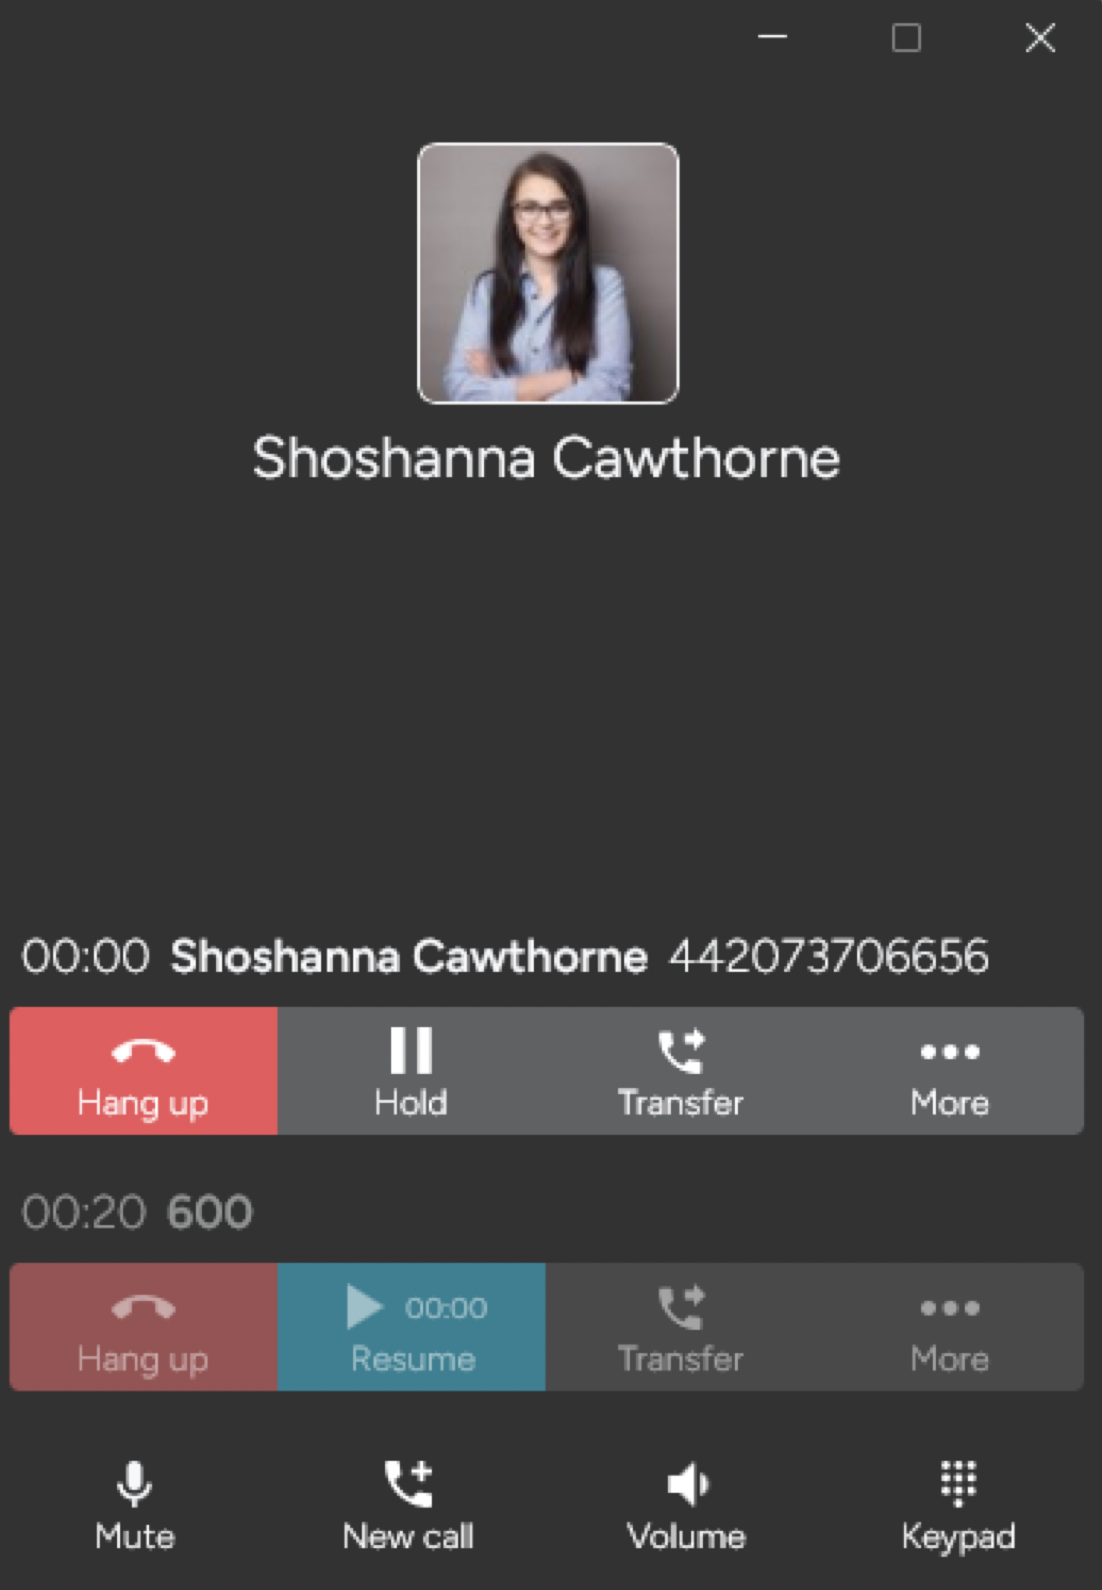
Transfer a call
You need to be in an active conversation.
-
In the call window, press the transfer button.
The active conversation is placed on hold.
A pop up opens in which you can select a name or number. -
Select the contact to whom you want to transfer the original conversation.
-
Once the call is accepted, announce that you want to transfer the original conversation.
-
Press the transfer button of the original conversation again.
The conversation is now transferred.
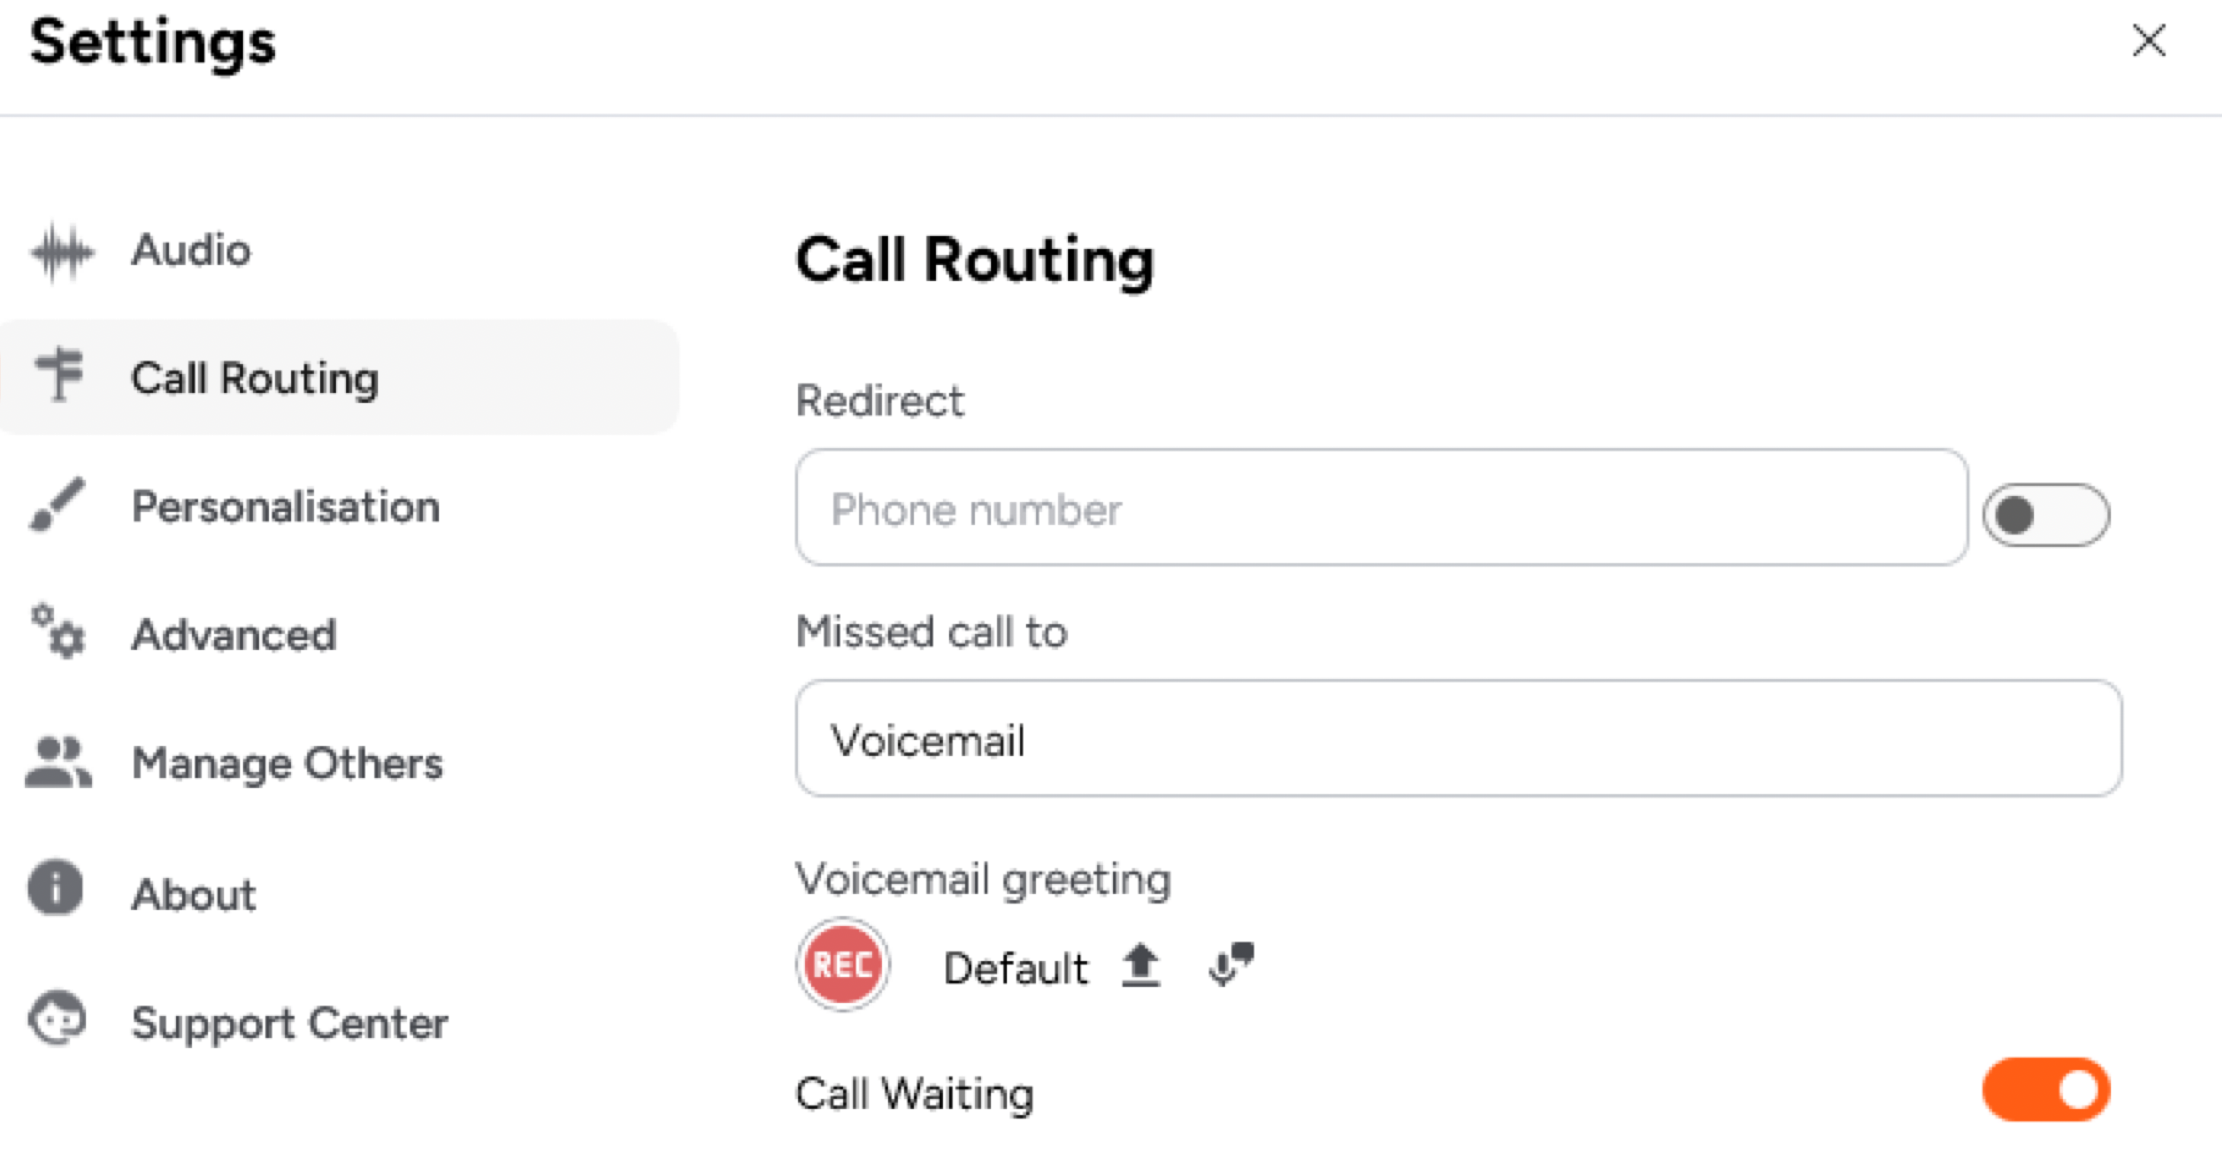
Set up voicemail
Your voicemail box should already be active.
-
Press your avatar.
Your user profile opens. -
Press Settings.
-
Press Call Routing.
-
Adjust your voicemail settings.